Integrate VMware Horizon View
This technical integration guide describes how to integrate a VMware Horizon View and Identity as a Service. Although this document specifically covers the VMware View KVM appliance (v), the information provided applies to all VMware View Series appliances using the Device Manager software. The aim of this integration is to provide strong, second-factor authentication for your VMware View Series appliance solution using Identity as a Service.
The VMware Horizon View software supports the Identity as a Service authentication methods and authentication protocols listed in the table below. The capabilities may depend on the Identity as a Service configuration, or the setup of other 3rd party authentication resources (Active Directory, for example).
Supported authentication methodsSupported authentication methods
| Authentication method | Notes | Supported protocols |
|
Password |
Password authentication is first-factor authentication with Identity as a Service password feature. |
PAP, CHAP |
|
RADIUS |
RADIUS authentication is first-factor authentication with a RADIUS server. |
PAP, CHAP |
|
External |
External authentication is first-factor authentication with an LDAP-compliant directory or a Windows domain controller through Kerberos. |
PAP, CHAP |
|
Grid |
Two-step authentication only. |
PAP, CHAP |
|
Token |
Identity as a Service supports response-only tokens. One-step and Two-step authentication (including push). |
PAP, CHAP |
|
Temporary Access Code |
Grid or token authentication must be configured. |
PAP, CHAP |
|
One-time password |
Two-step authentication only. |
PAP, CHAP |
|
Knowledge-based questions and answers |
The RADIUS proxy only supports a single question and answer. Two-step authentication only. |
PAP, CHAP |
|
Mobile ST |
Mobile Soft Token Push authentication (supports response-only tokens for second-factor authentication). |
PAP, CHAP Classic token authentication used for fallback. |
Note: VMWare Horizon View supports PAP and CHAP only.
PrerequisitesPrerequisites
Complete the following steps before integrating your authentication system with Identity as a Service:
Install and configure your first-factor authentication resource using the documentation provided by the vendor. The first-factor authentication resource can be a RADIUS server or an external authentication resource (a Local DB, LDAP-compliant directory or Windows domain controller through Kerberos).
Install and configure the RADIUS appliance using the documentation provided by the vendor. The device must be able to route traffic before integrating with Identity as a Service.
Install and configure Identity as a Service and an Identity as a Service Gateway (containing a RADIUS proxy agent). Take note of the shared secrets, IP addresses, and ports you use. You need this information to configure the RADIUS appliance and first-factor authentication resource.
If you want to configure your RADIUS appliance and first-factor authentication resource to recognize Identity as a Service user groups, you must define the Identity as a Service user groups first.
Integrate VMware Horizon View
Complete the following to integrate VMware Horizon View with IDaaS
Step 1: Configure IDaaS as a client on VMware Horizon View as an AAA clientStep 1: Configure IDaaS as a client on VMware Horizon View as an AAA client
This procedure assumes that you have already configured vCenter Server and VDI resource pool in VMware Horizon View server.
Configure Identity as a Service on VMware Horizon View as an AAA Client
Open a browser and enter https://localhost/admin
-or-
Go to Start > VMware > Horizon8 Administrator Console and click to open the VMware Horizon View Administrator Console.
The VMware login page appears.
Note: You must enter https://<IP address>/admin (for example, https://10.10.10.20/admin) to open the VMware Horizon View admin console on different windows or computers, where the IP address is the Windows server 2012 static IP address.
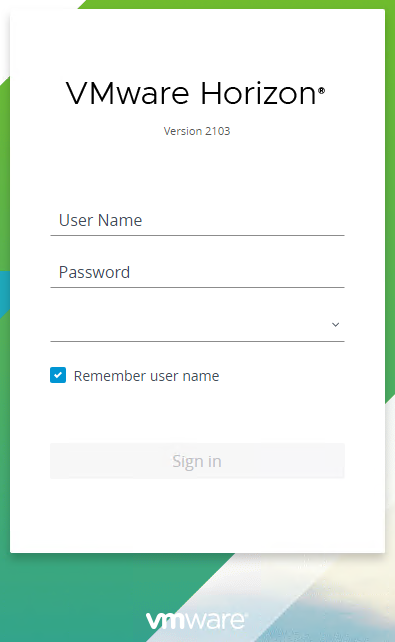
In the User Name type enter administrator.
In the Password field type the Active Directory Server administrator password.
Select the required Domain from the drop-down list, for example, IDaaSUSER.
Click Log In. The VMware View Administrator Dashboard page appears.
Expand View Configuration > Servers. The Servers page appears.
Click the Connection Servers tab. The VMware Horizon View Connection Server page appears.
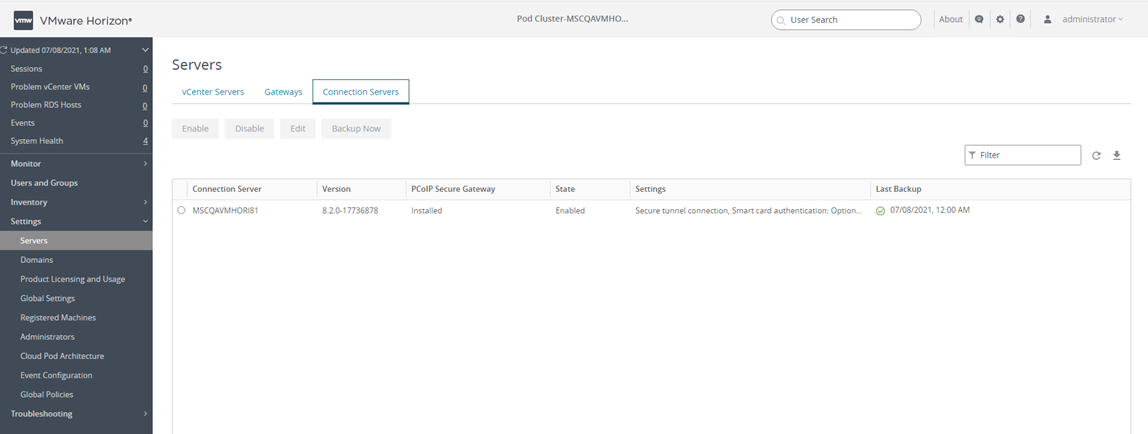
Select the Connection Server from the list.
Click Edit. The Edit Connection Server Settings page appears.
Click the Authentication tab. The Authentication page appears.
From the Advanced Authentication 2-factor authentication drop-down list, select RADIUS. The Authentication page updates with two-factor authentication options.
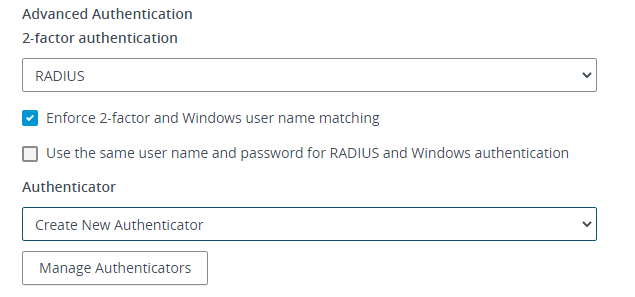
Select the Enforce 2-Factor and Windows user name matching check box.
Enable to enforce 2-Factor and Windows username matching. The Entrust username value must match your Active Directory username, including any Realm prefix and Realm suffix values.
Disable to allow the username to be different and users can perform first login with Entrust credentials and login with shared or common Windows/AD user.
Select Use the same user name and password for RADIUS and Windows authentication.
When enabled, the Entrust password and Windows/AD Password for the user must match, and the Entrust First-Factor authentication method must be configured for External. You must enable this feature for Entrust two-step authentication.
If disabled, the user is prompted for Entrust password and multi-factor authentication and Windows/AD Password separately.
Note: For one-step authentication, this feature must be disabled. If enabled, the user receives an “Unknown user name or bad password” error and the user is prompted for the Active Directory password. If this is setting is disabled, the use is prompted for the Active Directory password after Entrust multi-factor authentication.
From the Authenticator drop-down list, select Create New Authenticator. The Add RADIUS Authenticator page appears.
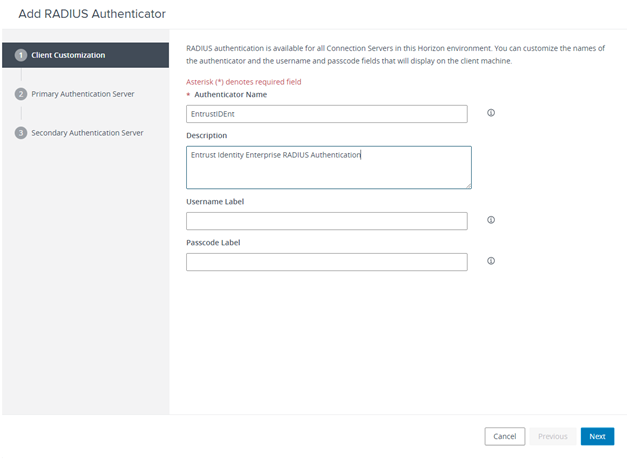
In the Client Customization page, do the following:
In the Authenticator Name field, enter a name that indicates the configuration is for Identity as a Service. For example, EntrustIDaaS.
Optional: In the Description field, add details about the RADIUS server.
In the Username Label field, enter the label to that displays during log in.
In the Passcode Label field, enter the label that displays during log in.
Click Next. The Add RADIUS Authenticator - Primary Authentication Server page appears.
In the Add RADIUS Authenticator - Primary Authentication Server, do the following:
In the Hostname/Address field, enter the hostname or IP address of your Identity as a Service gateway.
In the Authentication Port field, enter the RADIUS authentication port 1812.
Leave the Accounting Port field blank.
Select the required Authentication type (PAP or CHAP) from the drop-down list.
In the Shared secret field, enter the RADIUS shared secret value you share with Identity as a Service.
In the Server timeout field enter a maximum server timeout value. This value should be greater than the IDaaS VPN timeout value if you are using TVS Authentication.
In the Max attempts field enter the 10.
Leave the other settings at the default values.
Click Next. The Add RADIUS Authenticator – Secondary Authentication Server page appears.
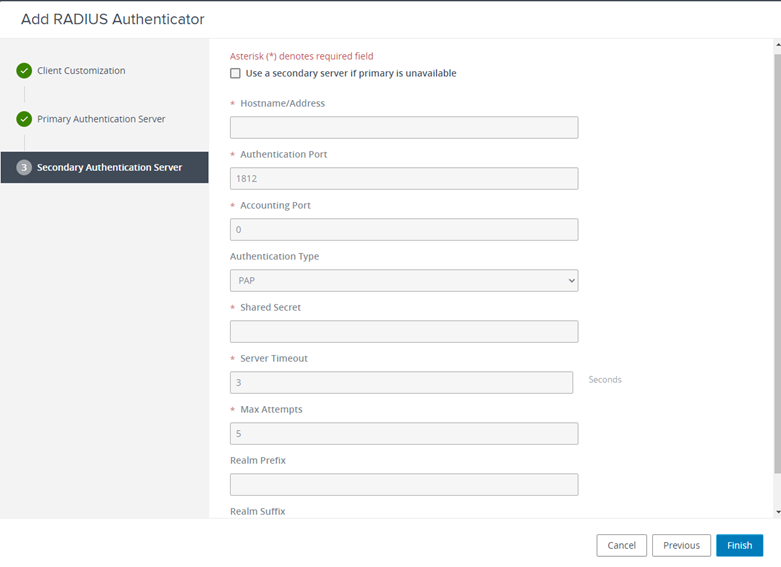
Optional: Configure failover for the application.
Click the Use a secondary server if primary is unavailable check box.
Enter the required values for the following information fields:
Hostname/Address
Authentication port
Authentication type
Shared secret
Server timeout
Max attempts
Click Finish. The Edit Connection Server Settings page appears.
Click OK to close the Edit Connection Server Settings.
You have finished adding and configuring the RADIUS server settings in VMware View.
Note: Entrust recommends that when multiple RADIUS applications are configured that each RADIUS application is given a unique shared secret.
Integrate a RADIUS client
Click ![]() > Security > Applications. The Applications page appears.
> Security > Applications. The Applications page appears.
Click Add. The Select an Application Template page appears.
Do one of the following:
Select RADIUS and VPN Integrations from the search drop-down list and scroll to find the application you want to add to IDaaS.
- or -
In the Search bar, enter a search option to filter for the application you want to add to IDaaS.
Click VMware. The Add VMware page appears.
Optional: Edit the Application Name.
Optional. Enter a Description for your application.
Optional. Add a custom application logo as follows:
Click ![]() next to Application Logo. The Upload Logo dialog box appears.
next to Application Logo. The Upload Logo dialog box appears.
Click ![]() to select an image file to upload.
to select an image file to upload.
Browse to select your file and click Open. The Upload Logo dialog box displays your selected image.
If required, resize your image.
Click OK.
Click Next. The Setup page appears.
Click Add to next to Hosts to add the host name of the VPN server. The RADIUS agent receives the request on this host. The RADIUS Agent on the Gateway determines the RADIUS application the request is for based on the host name and port.
Enter the host name in the Host dialog box and then click OK. Repeat this step to add more host names.
In the Port field, enter the port on which the RADIUS agent accepts messages.
Tip: Do not enter 8443 as the port number for this application. Port 8443 is used by the Entrust Identity Enterprise agent in your Gateway.
Attention: The RADIUS agent uses the host name that sent a request and the port number that it received the request from to determine which RADIUS application made the request. Because of that:
–Two RADIUS applications with the same port value cannot share any host names.
–Two RADIUS applications that have one or more matching host names must have different port values.
In the Shared Secret field, enter the shared secret that is used by your VPN server. This is the RADIUS secret shared between your VPN server and the RADIUS server. The shared secret value must match a shared secret in your RADIUS client.
From the Select RADIUS Agent drop-down list, select the name of the Gateway containing the RADIUS agent to which this application will be assigned.
Optional: From the Select RADIUS Attribute for IP Address drop-down list, select the RADIUS attribute that corresponds to your IP location.
In the Challenge Response Queue Max Time field, set the number of seconds that the RADIUS agent waits for a response to first-factor authentication. The default value is 180 seconds.
In the Challenge Response Queue Max Size field, set the maximum number of second-factor challenge requests allowed in the queue of your RADIUS application. The default value is 1000 requests. The maximum value is 10,000.
In the Request Cache Timeout field, set the number of seconds to cache requests. The default value is 10 seconds.
From the Character Set drop-down list, select the character set used to decode and encode string values (including the user ID and password values) in RADIUS messages. The options are UTF-8 and ISO-8859-1.
Optional: Select Log RADIUS messages to enable RADIUS message logging. When enabled, messages for the RADIUS agent are logged to the same log file as the gateway logs.
Optional: Enable the Authentication Settings.Optional: Enable the Authentication Settings.
Select Enable Push Authentication Fallback if you want to authentication to fallback to another authenticator in the event of a failure. If required, set the Push Authentication Fallback Timeout to the number of minutes before the push authentication times out.
Select When authenticating the user will be asked to select their second-factor authenticator. When selected, after the user responds to the first-factor challenge, they are prompted to select their second-factor authenticator. The list of available second-factor authenticators is set by the resource rule.
The following is a list of supported strings matched to the authentication types:
Grid: grid
Knowledge-based Authentication: kba
One-time password: email, sms, voice
Smart Credential Push: scpush
Temporary Access Code: tac
Token: token
Token push: push
Select Indicate if requests must include the message-authenticator attribute for incoming messages to include the message-authenticator attribute for incoming messages.
Select Indicate if requests must include the message-authenticator attribute for outgoing messages to include the message-authenticator attribute for outgoing messages.
Select Remove domain from user ID for incoming requests to remove the domain value from the user ID during authentication when the user ID provided by the RADIUS client is in the format domain\username and the user ID in IDaaS is in the format username.
Select Indicate if Active Directory password authentication requests are handled by the same Gateway Instance that initiated the request to require that Active Directory password authentication and change requests that are initiated as part of the RADIUS authentication are handled by any Gateway Instance in the same Gateway cluster that initiated it. If disabled, the request is handled by any Gateway Instance.
Select Enable one-step multi-factor authentication. When enabled, the user enters their user ID and then their password and token response in the password field. If you select this option, second factor authenticators available in the resource rule are limited to token and temporary access code.
Enter the One-step multi-factor authentication security token length. This is the length of the token or temporary access code response if you enable one-step multi-factor authentication.
Optional. Add Response Attributes.Optional. Add Response Attributes. Response attributes are returned to the RADIUS application after successful authentication. Use this setting to configure RADIUS attributes to return information such as the user's group information to the VPN server.
When adding response attributes, you optionally add group filters. For example:
Example:
Users in IDaaS may belong to one of the following groups CANADA, US, UK, FRANCE.
The VPN server wants the FilterID attribute returned from the IDaaS RADIUS agent to be the value NA or EUROPE, depending on whether the user is in NA (Canada, US) or Europe (UK, France).
To do this, use a RADIUS attribute filter for the FilterID attribute with a Groups value with the following filters:
- match CANADA, replace NA
- match US, replace NA
- match UK, replace EUROPE
- match FRANCE, replace EUROPE
Set the Response Attributes as follows:
Click ![]() Add. The Add a Response Attribute dialog box appears.
Add. The Add a Response Attribute dialog box appears.
Select the RADIUS Attribute ID from the drop-down list. The option you select depends on your VPN vendor.
Select the Value Type from the drop-down list.
To return a static value specific in the RADIUS attribute definition, select Static and enter a Value in the field and then click Add.
To return the user’s group membership, select Group and then optionally do the following:
- Click Add to add filters.
- Enter the Match and the Replace attribute filters.
- Click Add to add more attribute filters.
- If you add multiple filters, you can drag and drop them in order of preference.
- Select Stop after matching filter if you only want one the filter to return one value. Using the example above, if you want NA to have preference over Europe, make sure to list Canada and US in the list of filters.
- For Multiple Values Per Attribute, enter the Value Separator and then click Add.
Note: If a user belongs to more than one group, you can either add a separate attribute to your RADIUS response for each group or you can combine all of the groups into a single attribute. For example, if the user belongs to G1,G2,G3 then you would
- return a RADIUS response with three attributes
OR
- return a RADIUS response with one attribute and a value like “G1,G2,G3” where the , is defined in the Value Separator setting or a value like “G1 G2 G3” where the Value Separator is defined as a space.
Attention: The default group separator is a space. If you have group names that are separated by a space, use another separator, such as a comma.
Repeat these steps to add more response attributes.
Optional: Configure the EAP Settings to set up the application to use the EAP RADIUS authentication protocol.
Select EAP Enabled to allow the RADIUS application to accept EAP messages.
When enabled, authentication messages with EAP content are treated as EAP requests. The application can accept only EAP authentication requests.
When disabled, incoming authentication requests are processed by the RADIUS application as a standard RADIUS authentication request (even if the request includes EAP content). In this case, the application can accept only standard RADIUS authentication requests.
Select the EAP Protocol from the drop-down list. The options are PEAPv0 with MS-CHAPv2 and PEAPv1 with GTC.
This setting defines the type of EAP authentication protocol that is performed on EAP requests received by the RADIUS application. Consult the configuration requirements of your VPN server to determine which EAP protocol to select.
Select Return MPPE Keys to include the MPPE (Microsoft Point-to-Point Encryption) recv and mppe send keys in the Access-Accept message returned during a successful EAP authentication. The setting is enabled by default.
Select Use PEAPv1 label when calculating MPPE Keys to use the PEAPv1 label when calculating the mmpe recv and mppe send keys.
Leave the Minimum TLS Version, Maximum TLS Version and Allow Weak Ciphers at the default settings unless you have an older VPN and need to configure these settings to allow older versions of TLS or weaker ciphers to interoperate with older VPN servers that do not support the latest versions.
Configure the Deprecated Settings if your RADIUS application is connected to a Gateway version older than 3.0. These values are only required for backwards compatibility.
Select Token OTP Only, Password with second-factor, or No first-factor as the Authentication Type. This setting defines the level of authentication required to access a RADIUS application that relies on a gateway RADIUS agent configured before release 3.1.
Note: MSCHAPv2 authentication is not supported when No first-factor authentication is configured for the RADIUS application.
Click Submit.
Step 3: Add a resource ruleStep 3: Add a resource rule
Step 4: Test the integration using the following procedures
Launch the VMware Horizon View Client and initiate connection to the VMware Horizon Server.
In the Username field, enter the Identity as a Service username.
In the Passcode field, enter the Identity as a Service Password/TOKEN/Temporary Access Code.
Respond to the second-factor challenge and then click Login. You are prompted to enter the Active Directory password.
Enter the Active Directory password and then click Login.
You are successfully logged in and now have access to the resources.
Note: Make sure you have already unchecked Use the same username and password for RADIUS and Windows authentication.
Launch the VMware Horizon View Client and initiate connection to the VMware Horizon Server.
In the Username field, enter the Identity as a Service username.
In the Passcode field, enter the Identity as a Service Password.
Respond to the second-factor challenge and the click Login.
You are prompted for the second-factor authentication response. The challenge depends on the type of second-factor authentication you have configured in Identity as a Service.
Respond to the second-factor challenge and then click Login.
Access VMWare Horizon View in a Web browser.
In the Username field, enter the Identity as a Service username.
In the Passcode field, enter the Identity as a Service Password/TOKEN/Temporary Access Code.
Respond to the second-factor challenge and then click Login. You are prompted to enter the Active Directory password.
Enter the Active Directory password and then click Login.
You are successfully logged in and now have access to the resources.
Note: Make sure you have already unchecked Use the same username and password for RADIUS and Windows authentication.
Access VMWare Horizon View in a Web browser.
In the Username field, enter the Identity as a Service username.
In the Passcode field, enter the Identity as a Service Password.
Respond to the second-factor challenge and the click Login.
You are prompted for the second-factor authentication response. The challenge depends on the type of second-factor authentication you have configured in Identity as a Service.
Respond to the second-factor challenge and then click Login.