Add Risk Evaluation
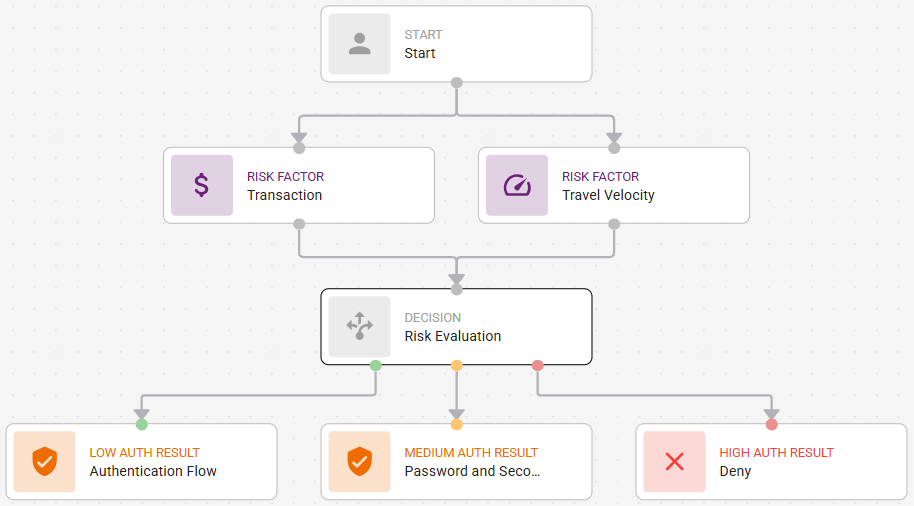
Risk evaluation calculates the risk result and sets the access based on low, medium, and high risk. All risk factors are connected to the Risk Evaluation node. The Risk Evaluation must include an access result to set authentication requirements to allow or deny access.
The following example shows a risk evaluation that requires second-factor authentication only if the risk is low, password and second-factor authentication for medium risk, and deny access for high risk.
Configure the risk evaluation and save the resource ruleConfigure the risk evaluation and save the resource rule
Click or hover over the Risk Evaluation node. The node displays three dots as shown in the following figure.
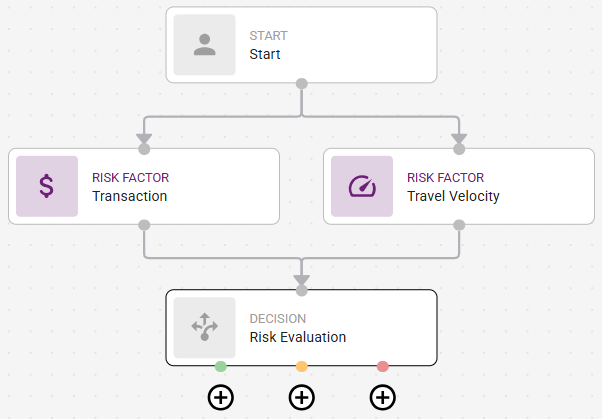
Click each ![]() for low risk (the green dot) and add an Authentication Flow or select Allow or Deny.
for low risk (the green dot) and add an Authentication Flow or select Allow or Deny.
Repeat this step to add risk evaluation for medium and high risk.
Update the required Authentication Flow, as follows:
Click the low risk Authentication Flow node. The Authentication Flow settings appear.
Click Select Authentication Flow. A list of available authentication flows appears.
Select the Authentication Flow required for the risk level.
You can optionally click Create Authentication Flow if the one required does not appear in the list. See Create authentication flows.
Repeat these steps for medium and high risk, as required.
Add Risk Weights. Risk Weights set the impact of each failed risk factor on the total risk score. The higher the percentage (%), the greater the risk factor influences the final risk calculation.
Click the Risk Evaluation node.
Click the Risk Weights slider. The Risk Weight slider appears.
See an example.See an example.
This example shows three risk factors that have been configured for the resource rule.
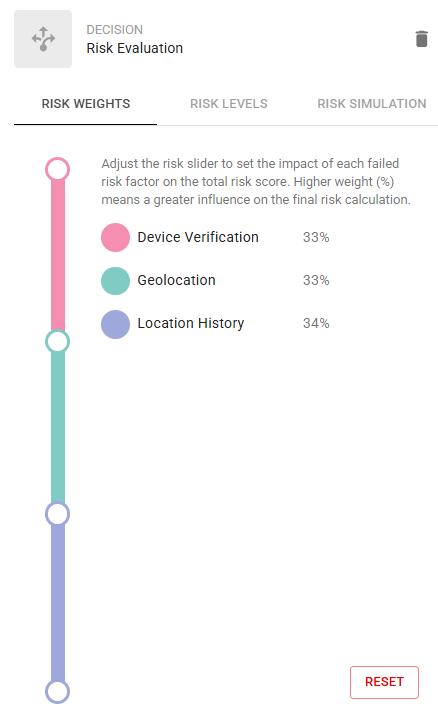
Click and drag the slider to set the risk weight percentage for each risk factor in the resource rule.
Click the Risk Levels tab. Risk Levels set the thresholds that evaluate users into high, medium, or low risk based on their total risk score. The Risk Level determines the authentication required to access the protected resource.
See an example.See an example.
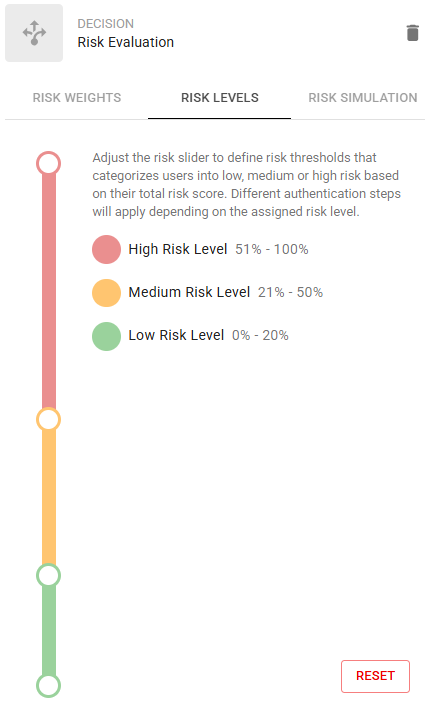
Click and drag the slider to set the risk level percentage (%) to set the Risk Level assessment to determine whether a user is evaluated as high, medium, or low risk.
Optional. use the Risk Simulation to simulate different access scenarios. The simulation helps you see the total risk score based on risk weight and risk thresholds.
See an example.See an example.
In this example, the risk is assessed as high risk because only Device Verification was successful in the risk evaluation.
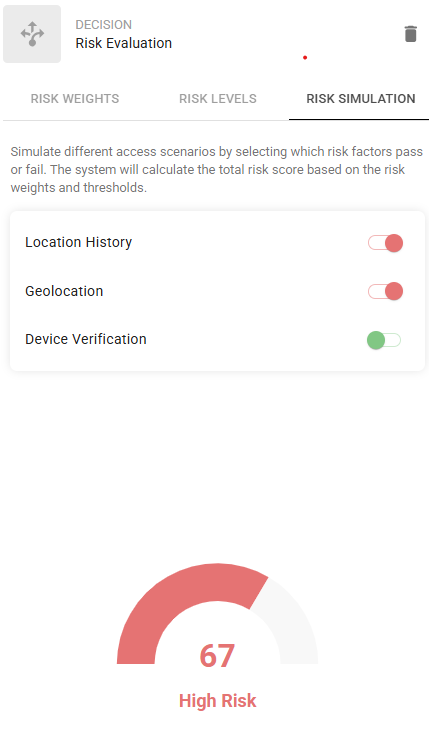
Click the Risk Simulation tab.
Toggle the risk factors on or off to see the total risk score based on the weights and thresholds for different simulations.
If required after using the simulator, adjust the Risk Weights and Risk Levels.
You can now save the resource rule. To do so,
Click anywhere in the Canvas to display the General Settings.
Click Save.
Note: If Save is not available, there is an error in the resource rule graph. Check the error messages in the Task bar. See Error messages for more information.