Create the PIV - Card Authentication certificate template
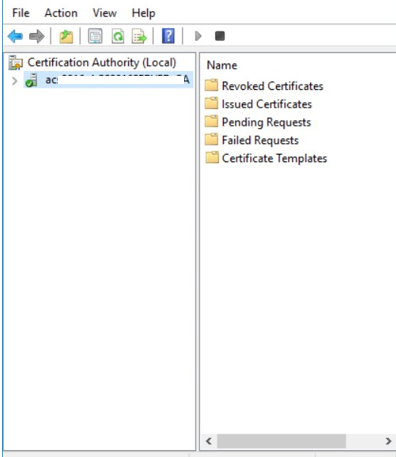
On the Microsoft CA machine, go to Start > Windows Administrative Tools > Certification Authority.
Click your Certificate Authority to expand the root folder.
To set the user permissions, right-click Certificate Templates, and then select Manage. The Certificate Templates Console appears.
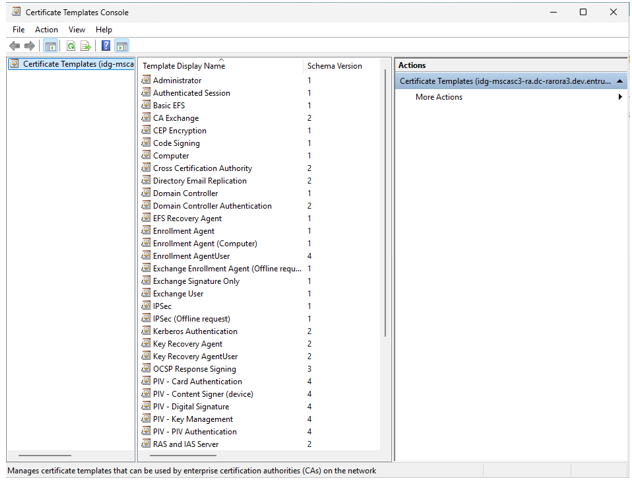
Scroll the template list, right-click the PIV - PIV Authentication template and select Duplicate Template. The Properties of New Template dialog box appears.

Click the General tab, and configure the following settings:
In the Template display name field, enter PIV - Card Authentication. The Template name field is filled in automatically with the template display name (with no spaces).
Deselect Publish certificate in Active Directory.
Click the Request Handling tab.
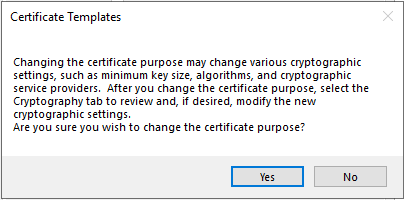
From the Purpose drop-down list, select Signature.
When asked to confirm the change, click Yes.
Click the Extensions tab.
Select Application Policies, and then click Edit. The Edit Application Policies Extension dialog box appears.
Add the PIV Card Authentication object identifier as follows:
On the Edit Application Policies Extension dialog box, click Add. The Add Application Policy dialog box appears.
Click New. The New Application Policy dialog box appears.
In the Name field, enter PIV Card Authentication
In the Object Identifier field, enter 2.16.840.1.101.3.6.8
Click OK to create the new extension policy.
Click OK again to return to the Edit Application Policies Extension dialog box.
On the Edit Application Policies Extension dialog box, remove the application policies that are not required.
Select Any Purpose and click Remove.
Select Client Authentication and click Remove.
Select Smart Card Logon and click Remove.
Click OK to close the dialog box.
In the Extension tab, select Issuance Policies and then click Edit. The Edit Issuance Policies dialog box appears.
Attention: You can add PIV policies as required by your organization. The id-fpki-common-cardauth issuance policy provided in the following steps is used by the U.S. Federal Government. Organizations outside of the U.S. Federal Government may not be able to issue or use these issuance policies. You should test your CA policy configuration with the applications they intend to use to ensure compatibility. If your application does not support the issuance policy, then you should not configure it.
On the Edit Issuance Policies dialog box, do the following
Select id-fpki-common-authentication and then click Remove.
Click Add. The Add Issuance Policy dialog box appears.
Click New. The New Issuance Policy dialog box appears.
In the Name field, enter id-fpki-common-cardAuth.
Leave CPS location empty.
In the Object Identifier field, enter 2.16.840.1.101.3.2.1.3.17
Click OK to create the new issuance policy.
Click the Issuance Requirements tab, and do the following:
Deselect (disable) all of the settings.
Click OK.
Click OK to close the open dialog boxes to return to the Certificate Templates Console.
The PIV - Card Authentication certificate template is added to the list of templates.