Add Risk Factors
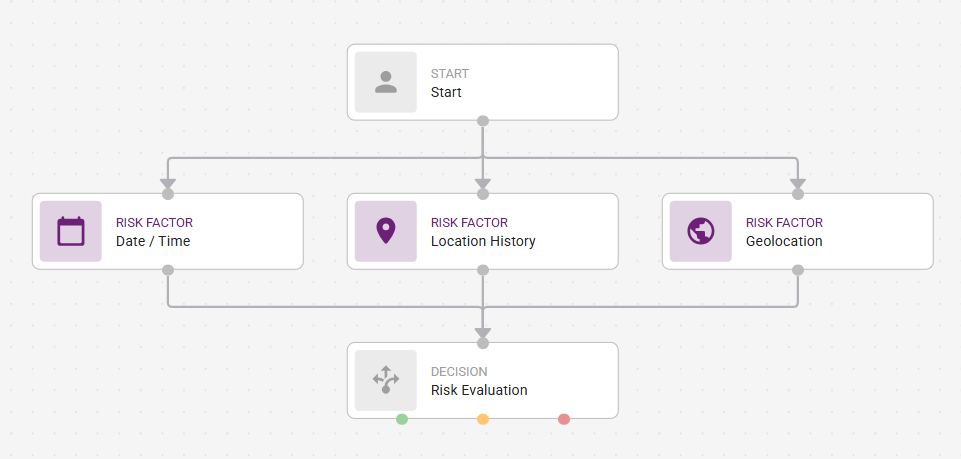
Risk factors are either connected to the Access Evaluation node or the Start node if no Access Filters have been added to the graph. Risk factors are then connected to the Risk Evaluation node. The following figures provide examples.
Risk factors with Access Filter connectionsRisk factors with Access Filter connections

Risk Factors with no Access Filters connectionsRisk Factors with no Access Filters connections
Risk Factors
Expand the following topics to see how to configure risk factors. To see the Risk Factor settings, click the Risk Factor node.
For example, to see the Date/ Time settings:
Click the Date/Time node. The Date/Time settings appear on the side of the graph window.
Configure the settings, as required.
Date/TimeDate/Time
The Date/Time risk factor sets restrictions for authentication attempts within specific dates and times.
Click the Time/WeekDay tab to set the time, date, and day restrictions, as follows:
Click Allow or Deny to allow or deny a user access based on the Date and Time settings.
Select the Time Zone from the drop-down list.
Set the Start Time. You can enter it manually or click the icon and set it with the clock.
Optional. Set the End Time. You can enter it manually or click the icon and set it with the clock.
Click the specific Weekdays that are restricted by the Date/Time settings.
Click the Date Range tab, to set Date Range decision.
Click Allow or Deny to allow or deny a user access based on the Date Range settings.
Select the Time Zone from the drop-down list.
Set the Start Date. You can enter it manually or click the icon and set it with the calendar.
Optional. Set the End Date. You can enter it manually or click the icon and set it with the calendar.
Click Save.
Device VerificationDevice Verification
The resource rule checks to ensure that the authenticating device contains a device certificate issued by a Trusted CA configured in IDaaS. There is no additional configuration required.
ExternalExternal
This setting adds External Risk Engines as a risk factor to the resource rule. You must have a risk engine configured to use this feature. See Manage external risk engines for more information.
Select the External Risk Engine from the drop-down list.
Click Add to add Rules.
Select the Rule from the list.
Repeat this step to add more rules.
Set a Risk Limit.
The risk limit value must be less than the maximum risk score.
External risk engine risk points apply if the accumulated risk score of the failed rules exceeds the risk limit.
Click Save.
GeolocationGeolocation
Geolocation allows or denies authentication from a list of countries.
Select Allow or Deny to create an allowed or denied country list.
From the Build countries drop-down list, select the country to add to the allowed or denied list.
Repeat this step to add more countries to the list.
Click Save.
Source IP AddressSource IP Address
Source IP Address allows or denies authentication from a list of IP addresses. To use this feature:
To use an IP List, you must have a configure an IP List. See Manage IP Lists.
Add Custom IP addresses or IP Ranges.
Complete the following, as required:
To add allow or deny access to an IP List:
Click IP List.
Select Allow or Deny to allow or deny access to an IP List.
From the IP List drop-down list, select the IP address to add to the allowed or denied list.
Repeat this step to add more IP Lists.
To add a Custom IP address:
Click Custom. In the IP Range field, enter the IP address or the CIDR (custom IP range). This feature supports IPv4, IPv6, and CIDR addresses.
Press Enter to add the IP address or the CIDR.
Repeat these steps to add more customer IP addresses or CIDRs.
Click Save.
Location HistoryLocation History
The resource rule checks to ensure that the IP address in the request matches a location that was used for a previous authentication request. No further configuration is required for this setting.
The Location History is determined by the settings configured for risk-based authentication. See Modify risk-based authenticator settings.
Machine AuthenticationMachine Authentication
Machine authentication checks for the fingerprint mismatch risk limit.
The risk score is based on the attribute differences between a user's Machine Authentication information and that recorded on Identity as a Service before the condition fails. If an attribute does not match, the attribute incurs the number of risk points shown in the Fingerprint Mismatch Risk Limit. The Fingerprint Mismatch Risk Limit values of each non-matching attribute are added together, resulting in a total risk score. This score is normalized to be out of 100 as follows:
Total Risk Score = (Total Risk Points of Failing Attributes / Maximum Risk Points of All Enabled Attributes) * 100
The resource rule condition fails when the number of non-matching risk points exceeds the Machine Authentication Risk value defined in this step. A value of 0 means that a single attribute difference causes the Device Fingerprint condition to fail. The default value is 3. The value between 0-50 can be entered.
The default value is defined by the Machine Risk Limit. To use this feature, both machine nonce and device fingerprint must be enabled. See Manage machine authenticator settings.
Set the Fingerprint Mismatch Risk Limit
Drag the rule to set the Fingerprint Mismatch Risk Limit to the maximum total number of non-matching risk points allowed before a machine authentication attempt fails. Each mismatch adds 10 risk points by default.
Click Save.
TransactionTransaction
Transaction contexts
Resource rules can support up to two transaction contexts as part of their evaluations for Entrust Identity as a Service Authentication APIs and OIDC and OAuth applications. Transaction contexts work as follows:
Resource rules can support up to two transaction contexts as part of their evaluations for Entrust Identity as a Service Authentication API applications.
A transaction context is associated with one or more transaction rules with a risk score. As transaction rules are evaluated, if the accumulated risk score of the failed transaction rule is greater than a defined risk limit value for the transaction context, risk is assumed and the transaction context risk points are added to the overall risk point total.
A transaction rule is defined as a transaction rule expression.
A transaction rule expression is a boolean expression, using AND and OR operators, where the operands of the expression can be additional transaction rule expressions or transaction item expressions.
A transaction item expression is a simple, single expression of a transaction item and its expected value (for example, Account = "S053541", Amount > "10000", Action = "DEPOSIT", Channel = "ATM").
A transaction item is a transaction detail name, that is passed in transaction details during authentication, along with its type (STRING or NUMERIC), whether it must be present if a transaction rule uses it, and its default value if it is does not need to be present and is not passed as part of the transaction details during authentication.
To set transactions contexts, see Manage transactions. You need to do this first before you add Transactions to the resource rule.
Configure Transaction Risk Factor
Click the Risk Condition tab, and configure the following:
Enter a Name for the transaction.
Click Add to add a transactions rule. See Manage transactions.
Click Add again to add more rules.
Enter the Risk Limit to the maximum transaction risk points allowed before a transaction attempt fails. Transaction risk points apply if the accumulated risk score of the failed transaction exceeds the risk limit.
Click Save.
Click the Manage Transactions tab to add or edit Transaction Rules, as follows:
To add a rule
Under Transactions Rules, click Add. The Add Transaction Rule dialog box appears.
Enter a Name for the transaction rule.
Select the AND or OR operator for each added group expression.
Select the Transaction Item to which the rule applies from the drop-down list.
Select the Operator from the drop-down list.
Add a value in the Value text box.
To add another set of rules to the Transaction Rule, click Add Group.
Select the AND or OR operator for each added group expression.
Select the Transaction Item, Operator, and add a Value.
Click Submit when done.
Click Save.
To test a rule
Click ![]() to test the Transaction Rule. The Test Rule dialog box appears.
to test the Transaction Rule. The Test Rule dialog box appears.
Click Test Rule.
Click Close to close the dialog box.
Travel VelocityTravel Velocity
The resource rule checks that the travel speed (KMH) is above the value defined in the Check Travel Velocity setting of risk-based authenticators. See Modify risk-based authenticator settings.